VCF 9.1 – HCX Workload Migration Demo
Welcome back, in Part 2 of this HCX series we configured a Service Mesh between site-a and site-b in a Holodeck lab, to enable network extension and workload migration. In this post we’ll demonstrate the migration capabilities of HCX.
First up, I’ll do some prep work. I’m creating an NSX Network Segment with CIDR 10.1.12.1/24 to simulate an application network at site-a, and I’ll deploy a couple of test VMs to this segment.
I’ve also created the equivalent at site-b – 10.2.12.1/24 (I can’t route to this for some reason, probably a holodeck site-b quirk but we can still test).
Migration Scenarios:
1-A – L2 Network Extension, Migrate Workloads
2 – Migrate VM with Re-IP
1-B – Enable MON, Network Cutover from Site-A to Site-B
Scenario 1-A (L2 Extend / Migrate Workloads)
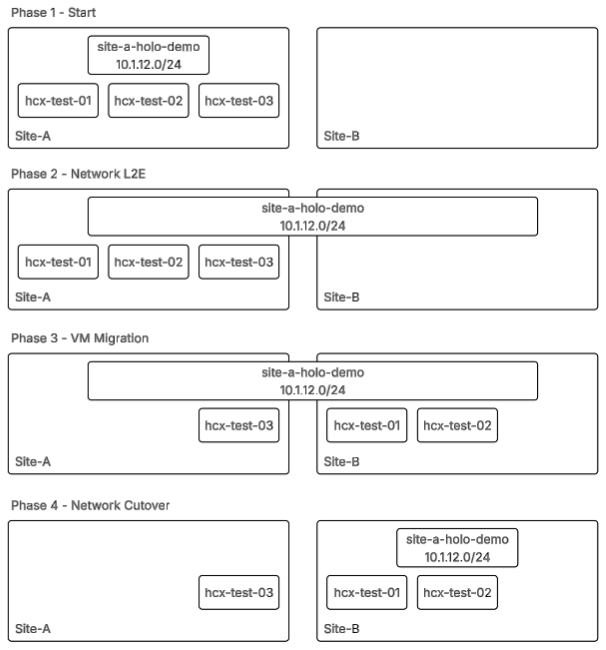
Let’s get started on #1. First up, we’ll create a L2E (Layer 2 Network Extension) which will to span the NSX Seg 10.1.12.1/24 across both site-a and site-b. Then we’ll migrate the VMs across to site-b using HCX, and lastly cutover the L2E from site-a/site-b to site-b only – thus simulating the workload and SDN network migration to a new datacenter.
hcx-test-03 will be migrated with Method #2.
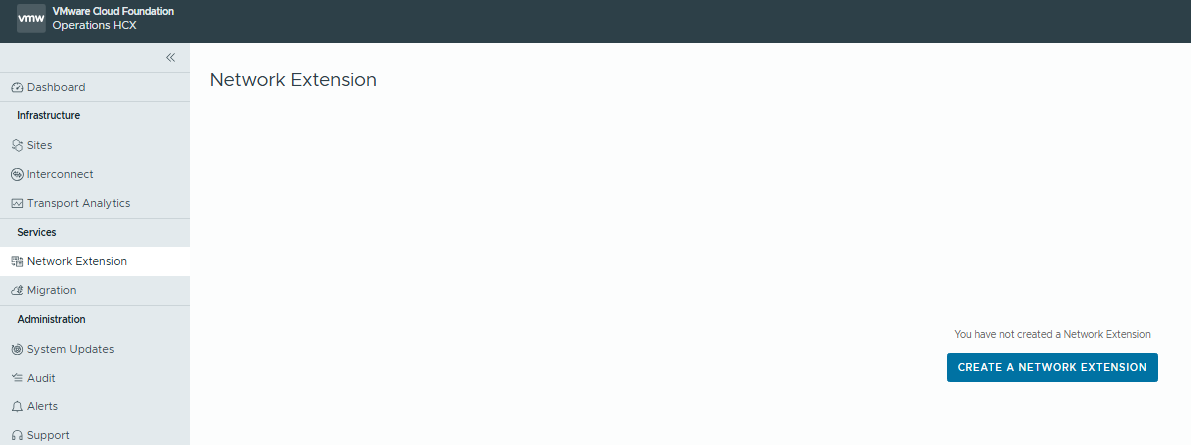
First up, log into HCX, browse to Network Extensions and click “Create Network Extension”
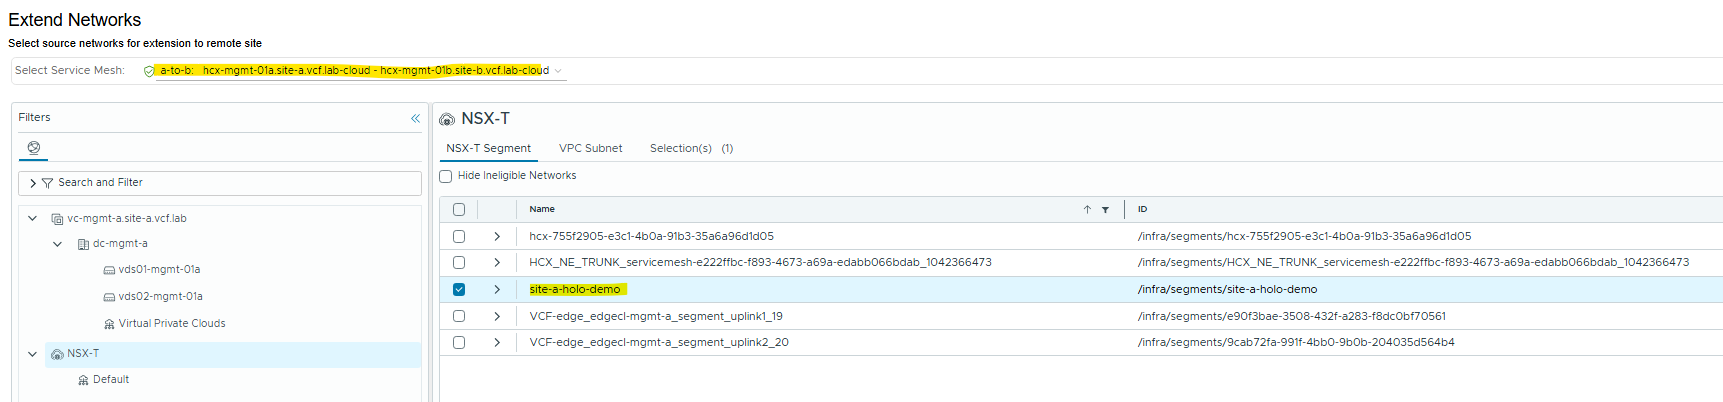
Ensure you have the correct service mesh selected, and select the Network Element you want to extend (Overlay/VLAN Backed/dvPG).
Select the destination first-hop router (should be the t1 router for that Domain). I’ll explain Mobility Optimized Networking (MON) afterwards, and show the enablement.
Fill the IP details for the subnet (gw 10.1.12.1/24), and select the extension appliance.
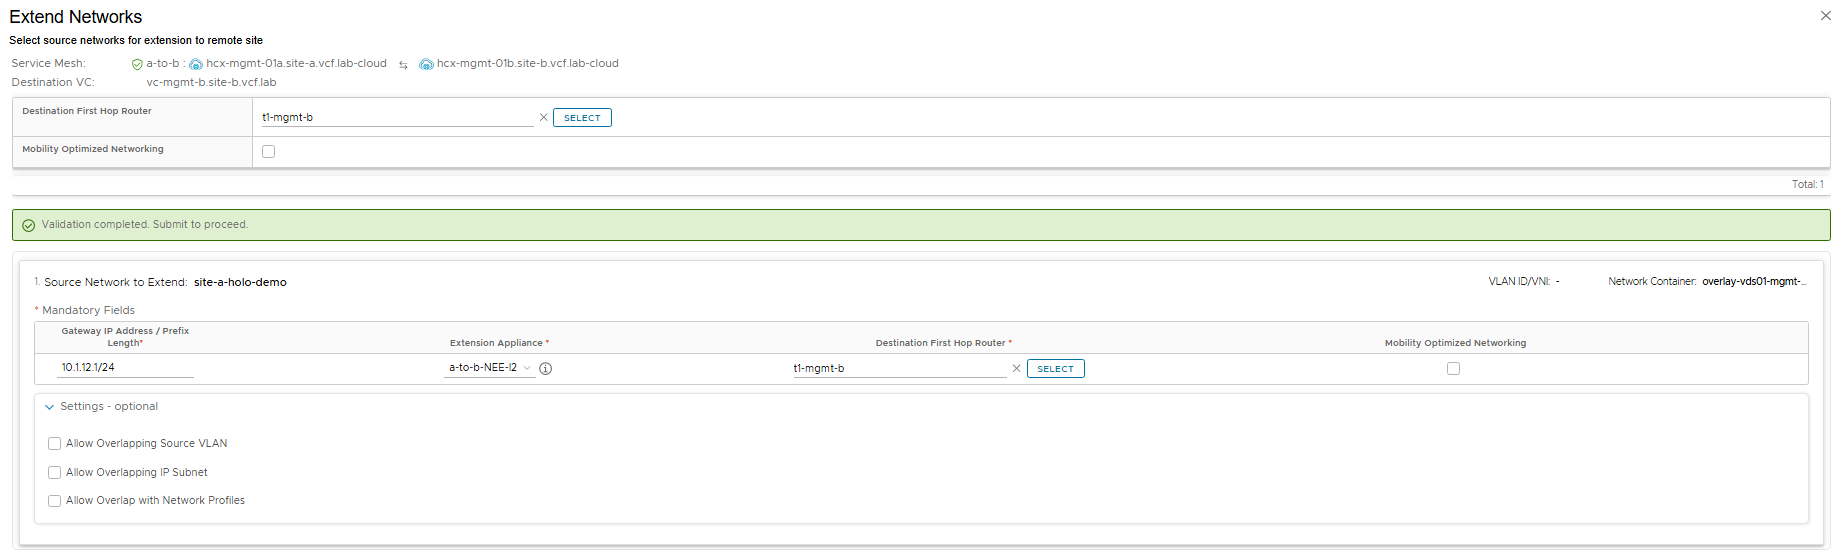
Click Validate then Submit, the L2E creation will then execute.
When the action completes, you’ll see the L2E listed in HCX, and we can also see the extended segment at site-b
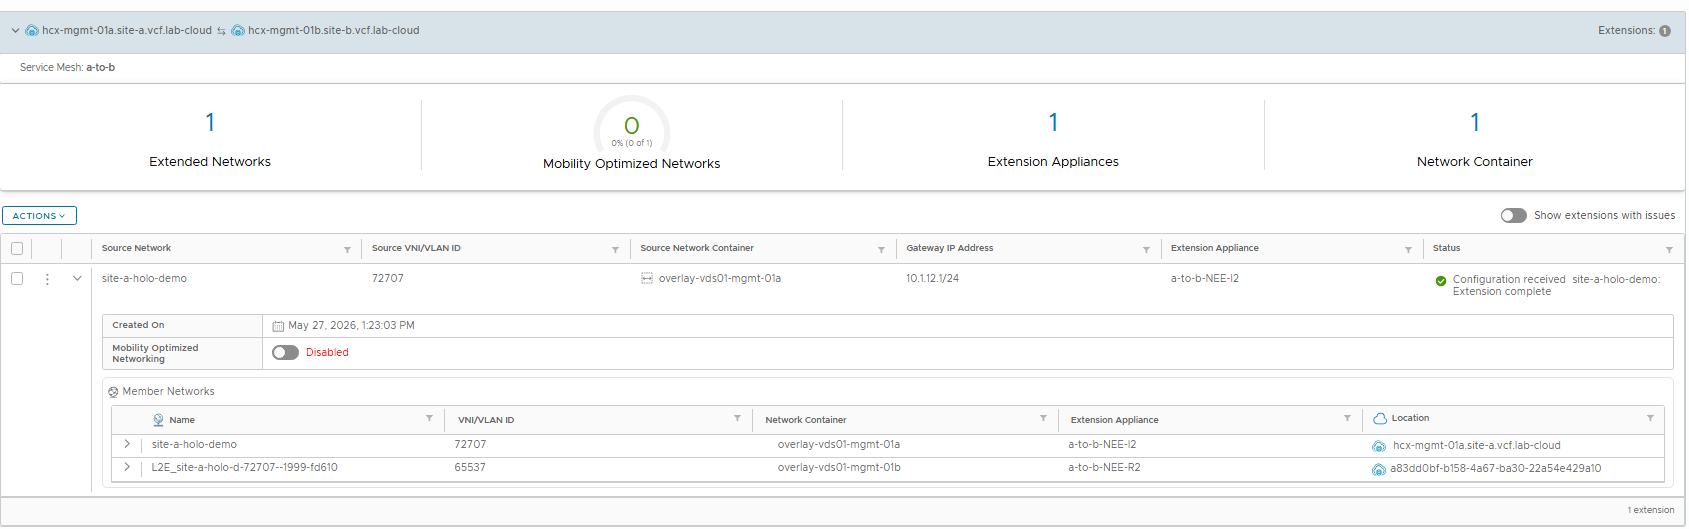

Ok now the network segment is available at both sites, so let’s move a couple of VMs from site-a to site-b
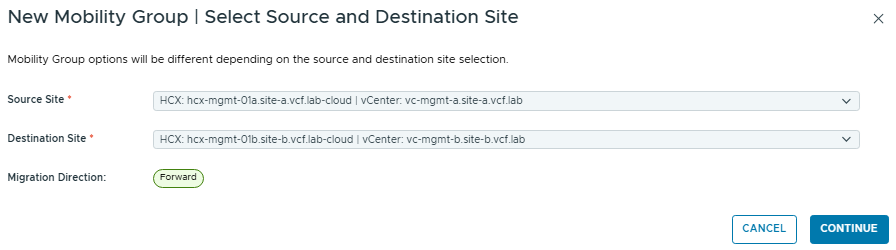
I’ll move hcx-test-01 and hcx-test-02. In HCX, browse to Services / Migration and click “New Mobility Group”. Select the source & destination pair.
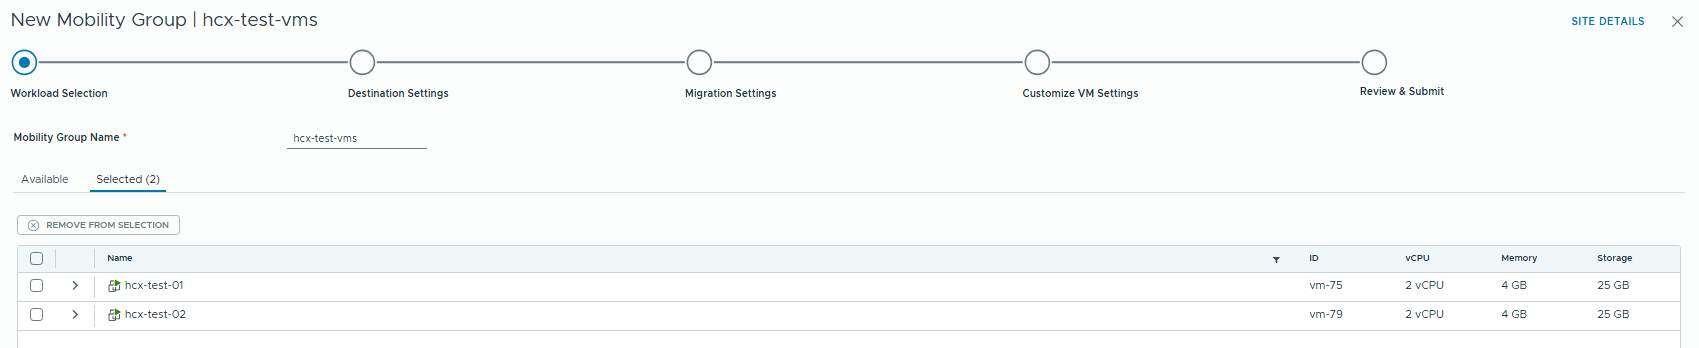
Now name the mobility group, and select the VMs.
Now select the destination cluster, datastore and network. My network destination has already picked up the matching L2E we created earlier.
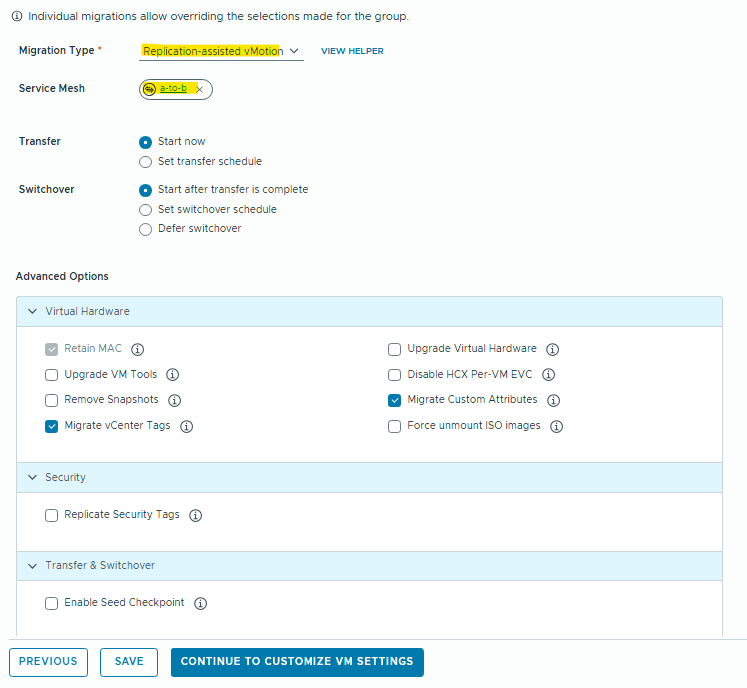
Click configure Migration Settings. Now we have a number of different migration methods. I’ll use Replication Assisted vMotion (RAV) which will pre-stage the disk data at site-b then live cut-over the compute with vMotion. See this link for an explanation of the different migration types. Check the advanced settings to see if any of these are relevant for your migration.
Under customize VM settings, you can override individual VMs to have a different destination network/cutover schedule/cluster etc. I’ll leave this default to inherit the default settings of the mobility group.
Review the summary and click “Run Migrations”
Now we’ll see the migration process start and we can monitor from the HCX Console.
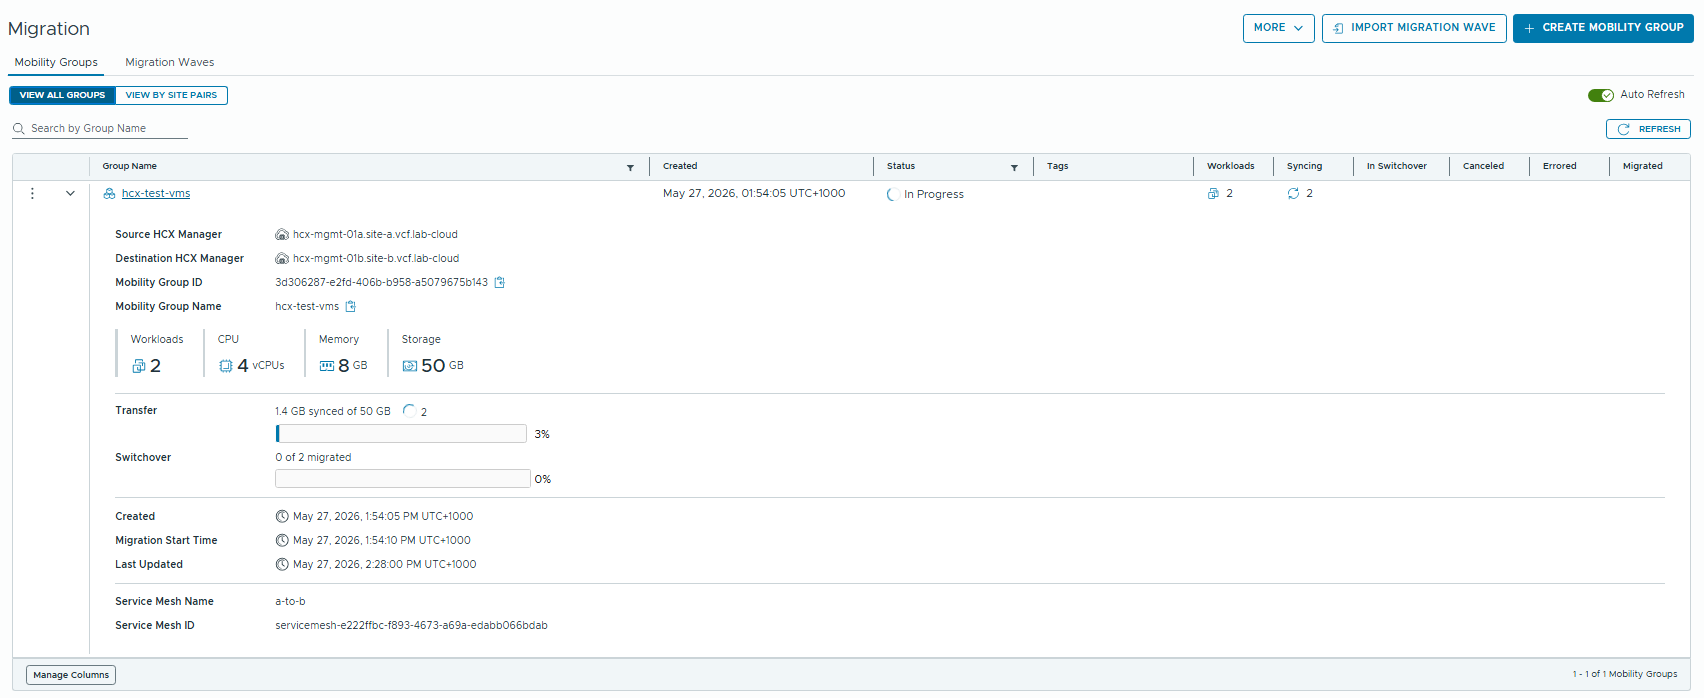
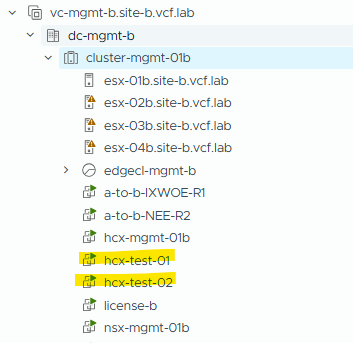
When the migration completes, we’ll see that hcx-test-01 and -02 have been moved to the site-b vcenter.
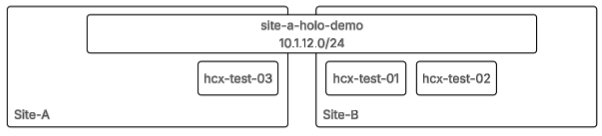
We are now in this state:
I should be able to ping test from hcx-test-01 (10.1.12.5) to hcx-test-03 (10.1.12.7) as the network is extended via L2E.
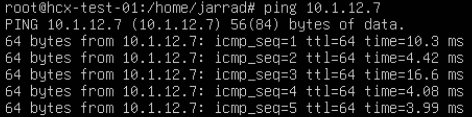
Success! – now onto Scenario 2.
Scenario 2 – Bulk Migration with ReIP
We’ll follow the same process as last time here – Create a Mobility group, and Configure the migration, but this time I’ll be picking a different destination network and configuring ReIP.
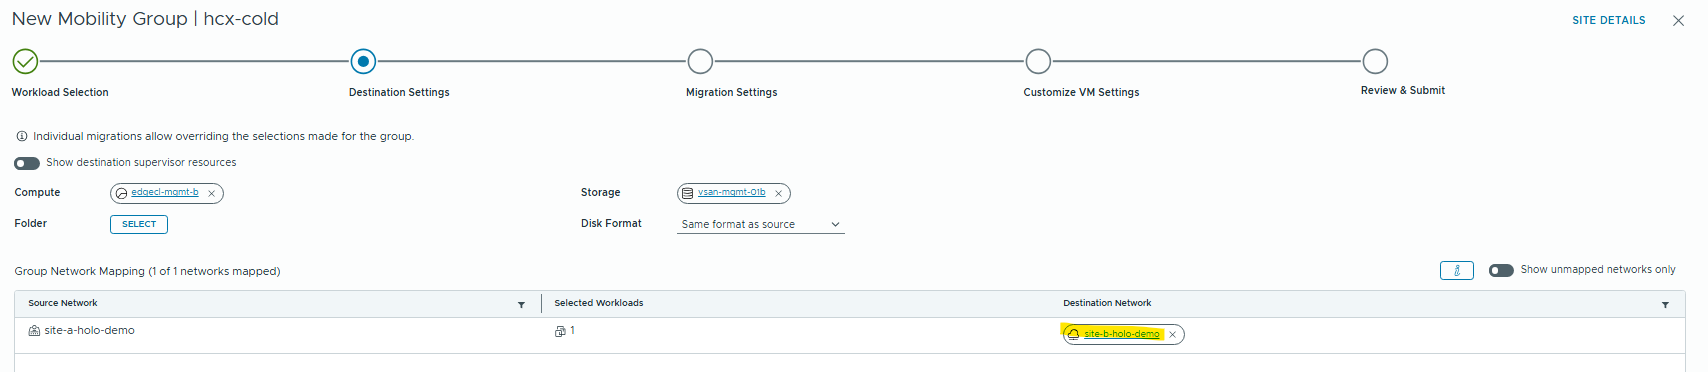
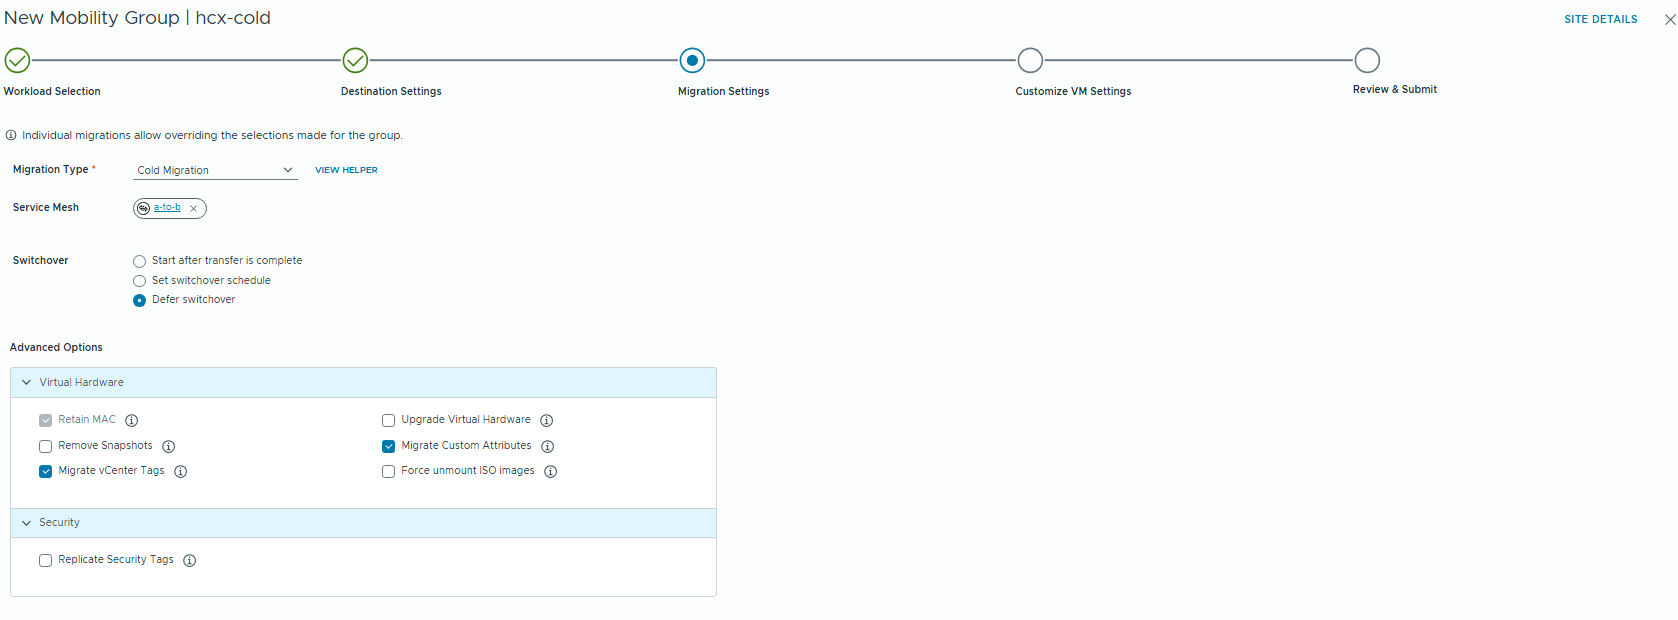
Migration Settings – select Cold migration, and I’ve also set “Defer Switchover” so that the data sync will occur in the background and I can trigger the cutover to the other site when I’m ready for my maintenance window – as we are doing cold migration/ReIP, there will be downtime on this VM.
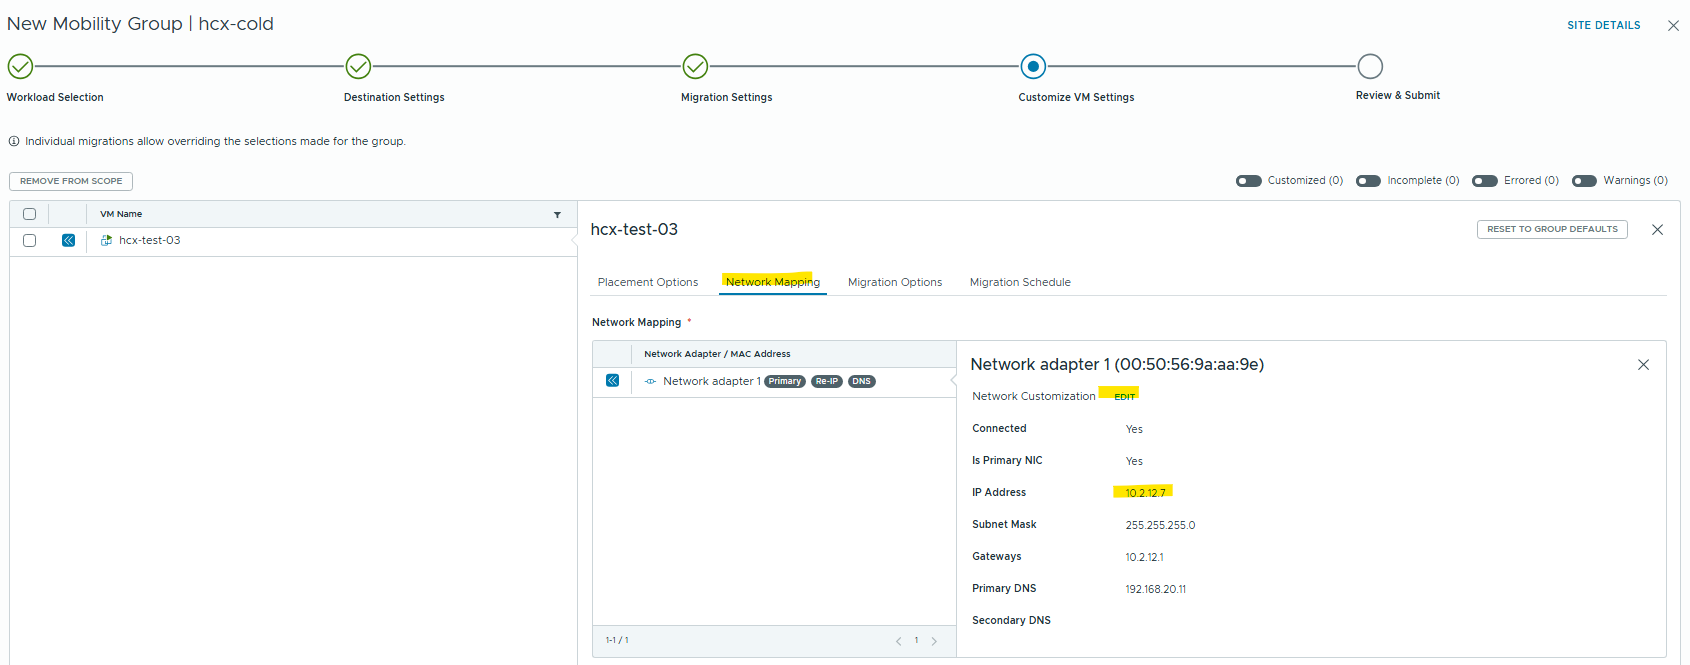
Now under the Customize VM Settings page, I want to change the IP when we perform the cutover. Browse to the Network Mapping tab, and we can set the IP details.
I’m migrating from site-a 10.1.12.7 to site-b 10.2.12.7
Then on completion we’ll see the VM migrated to site-b, on the new network, with a new IP.
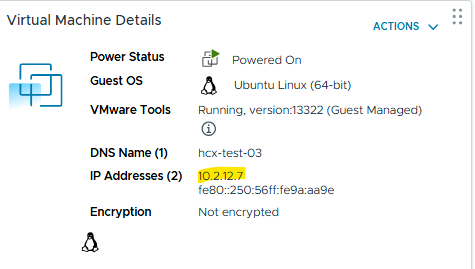
(Full disclosure, I manually changed the IP – note to self, check the HCX Guest OS Compatibility List for before planning a demo! Newer versions of Ubuntu are not supported yet).
Scenario 1-B
Ok, now we’ll come back to Scenario 1 to talk about Mobility Optimized Networking (MON), & Tromboning, and Network Cutover.
What is Tromboning?
An NSX-T overlay hosts a Gateway IP address as the first-hop router when VM traffic leaves the subnet. With L2E network extensions, by default the VMs that have been migrated to site-b will still be accessing the gateway located at site-a – this is going to introduce additional latency which may have an impact on your application performance.
See this diagram for a visualization. If hcx-test-01 pings hcx-test-03, the traffic will traverse the L2E back to site-a, then come back to site-b through the external connection, even though both VMs are at the same site.
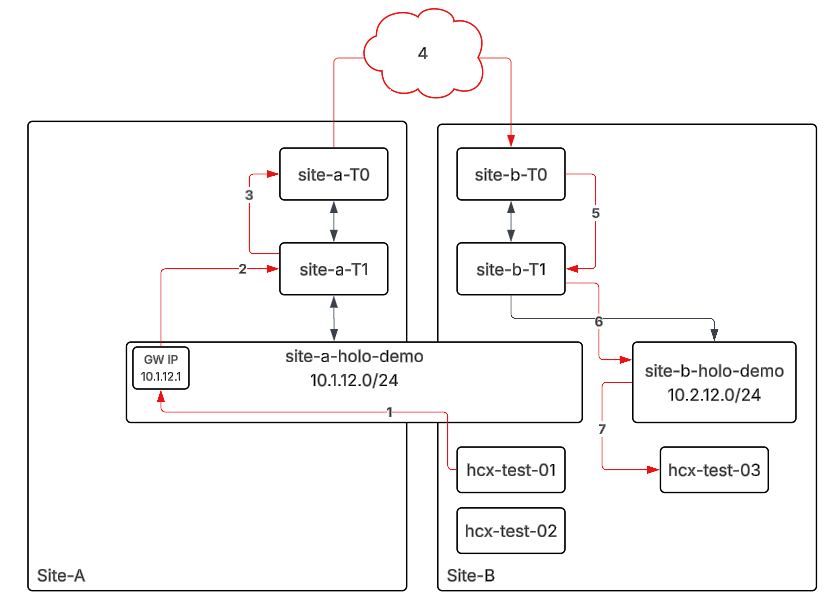
This is called “Tromboning”

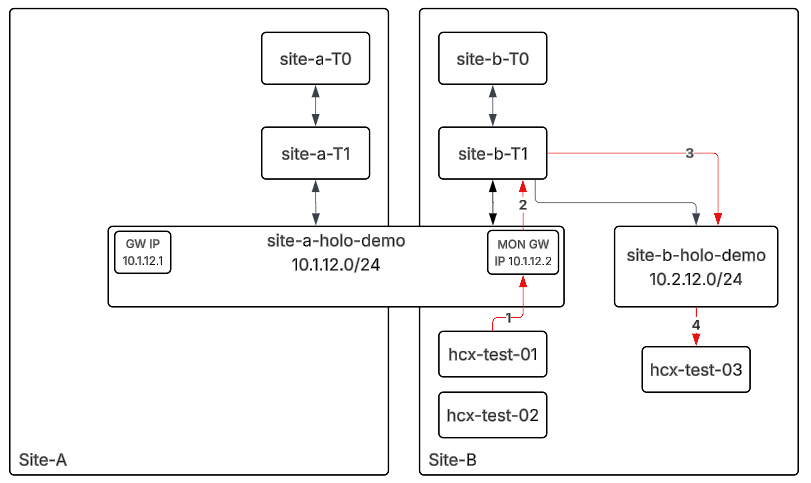
To mitigate this, we can enable Mobility Optimized Networking, which will provide a local gateway for site-a and another local gateway for site-b – thus shortening the route for VMs on the opposite end of an L2E.
Here’s what the traffic flow will look like with MON enabled – much shorter path, and does not introduce RTT latency from the site-a<->site-b link.
Back in HCX Manager, browse to Network Extensions, expand your network and click “Enable MON”

Now I want to select the VMs at site-b and assign them to the site-b MON gateway.
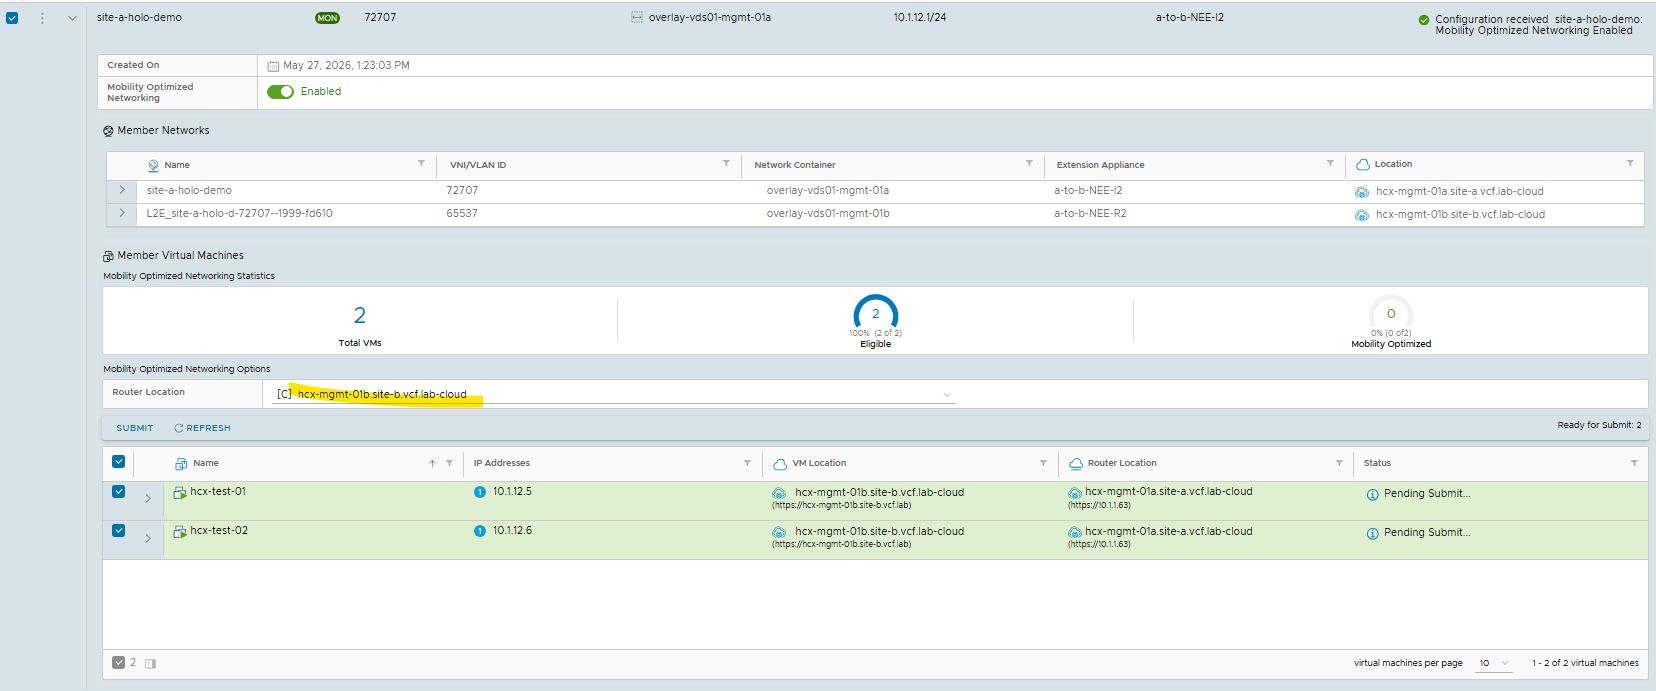
When it completes, you’ll see MON enabled on these VMs.

Note – This can be a disruptive action, ensure you schedule an appropriate maintenance window.
Before enabling MON, review the limitations documentation – there are some caveats around VMs with multiple NICs.
Network Cutover
So now we have moved all of our VM workloads from Site-A to Site-B, it’s time to cutover the network segment from site-a to site-b so we can decommission and remove site-a.
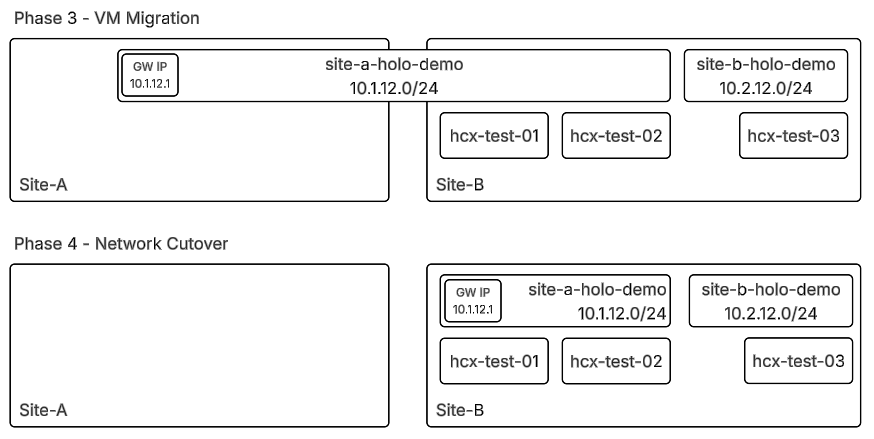
When we cutover the network, the network will stop being advertised via BGP on Site-A T0 and we’ll see it advertised via Site-B T0.
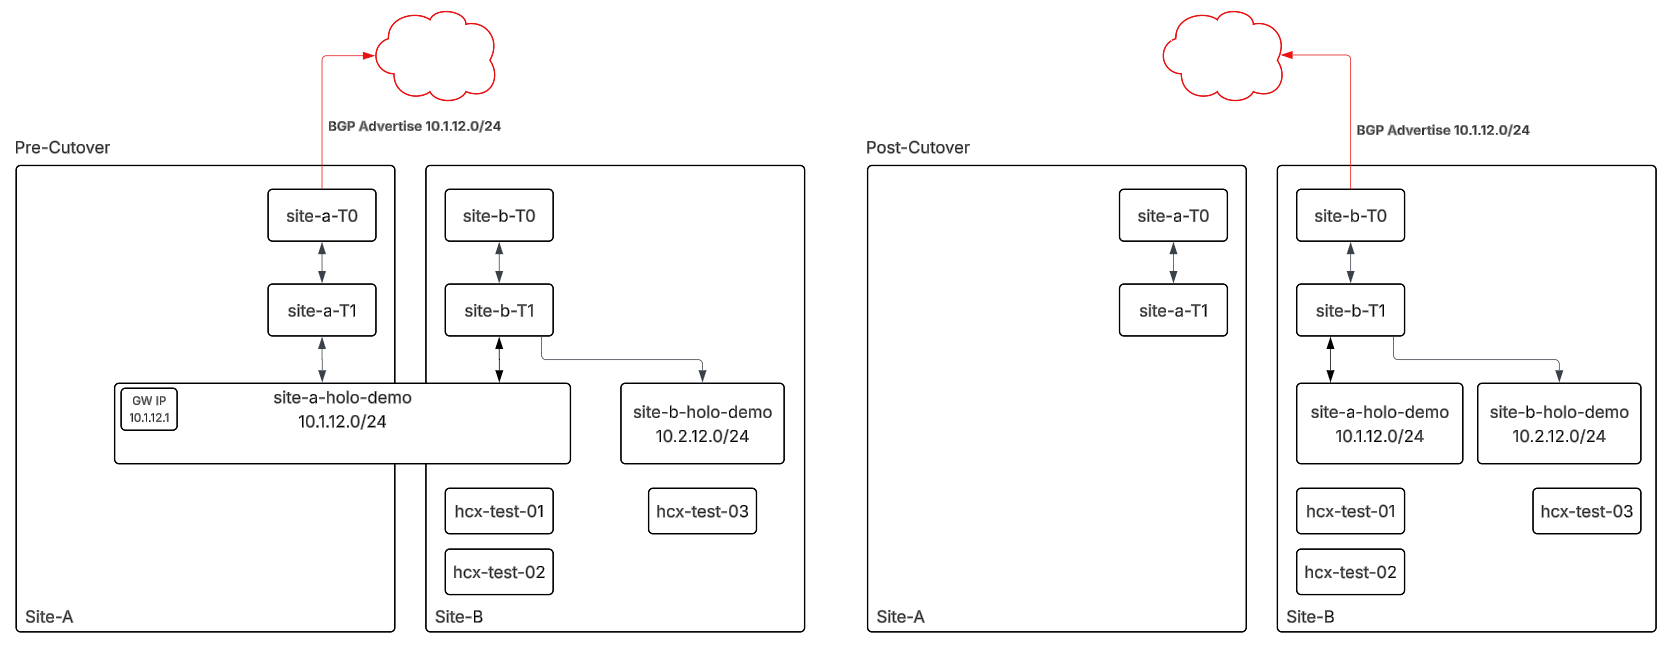
Browse to HCX Manager, Network Extensions
Select “Unextend Networks.”

IMPORTANT – Select “Connect cloud network to cloud edge gateway after unextending” – this performs a Migration to Site-B and disconnects Site-A.
If we leave this unselected it will unextend the network, with Site-A maintaining the gateway connectivity and Site-B external connectivity will be dropped.

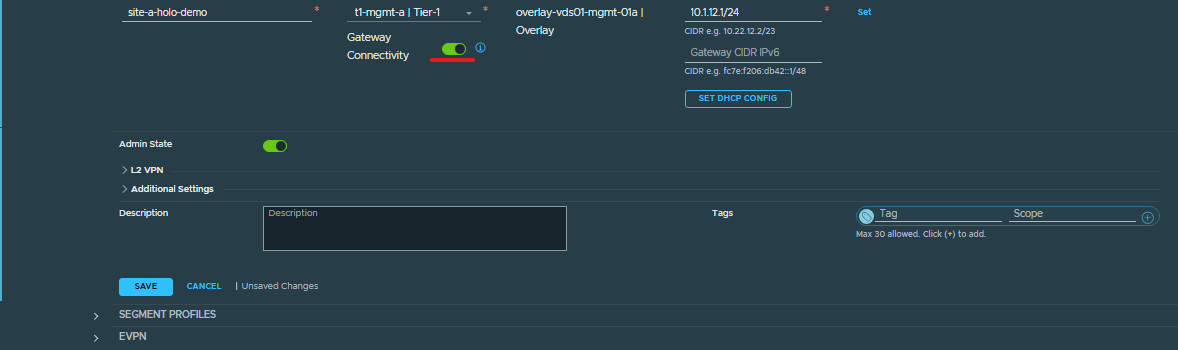
Now checking my lab, it appears the Site-A segment was not dropped off the gateway connectivity, so I’ll manually perform this step. This will ensure that the 10.1.12.0/24 subnet is NOT being advertised via BGP from both site-a and site-b simultaneously – that’ll cause weird routing issues.
So that’s it! HCX is a fantastic and easy to use tool for extending your networks to other DCs or Cloud Providers, and migrating workloads.