Aria Operations Management Pack Builder – phpIPAM Part 1
If you want to extend your Aria Operations monitoring to 3rd party environments, there are some pre-made management packs for a number of popular applications.
But what if you can’t find what you need? If it has an API, we can build it without writing code!
For this example, I’m going to build a Management Pack for phpIPAM, which is a popular open source product for organisations to document their Subnetting/IP Addressing.
I’m planning to create a Management Pack to populate dashboards in Aria Operations to display the Subnet Usage, IP Allocations, and link these IP Allocations to Virtual Machines.
First up, download the Aria Operations Management Pack Builder from the VMware Marketplace, deploy the OVA and boot the VM. After about 10mins the services will have started and we’ll be ready to begin.
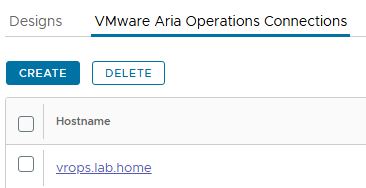
We can then configure a connection to your Aria Operations environment to pull in existing metric/property/relationship configurations.
Now we’ll get started building the phpIPAM module. Part 1 will cover the authentication/login configuration. Once that is in place we can start pulling some data in Part 2.
The phpIPAM API Documentation is going to be an absolute necessity so we know what API calls we can use.
We also need some configuration in phpIPAM to enable the API. Go to server settings and enable Prettify Links and API


Now browse to the API settings section and we’ll create an API application. We need to use SSL with User token and the App ID will be used in the API URL.

Now the prep work is done, we can configure the connection in the MP Builder.
Click on the “Design” tab and “Create” – name the project phpIPAM.
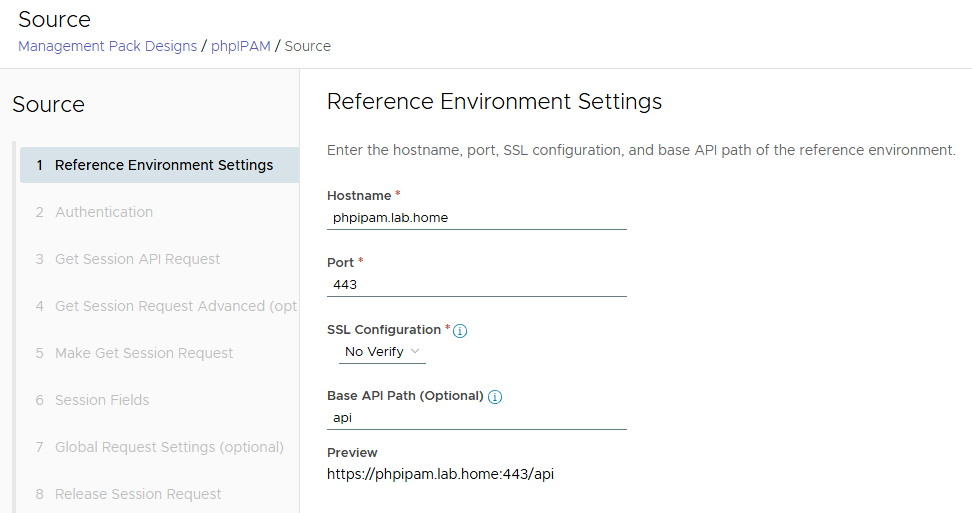
The source phpIPAM server is named phpipam.lab.home, so we’ll configure that.
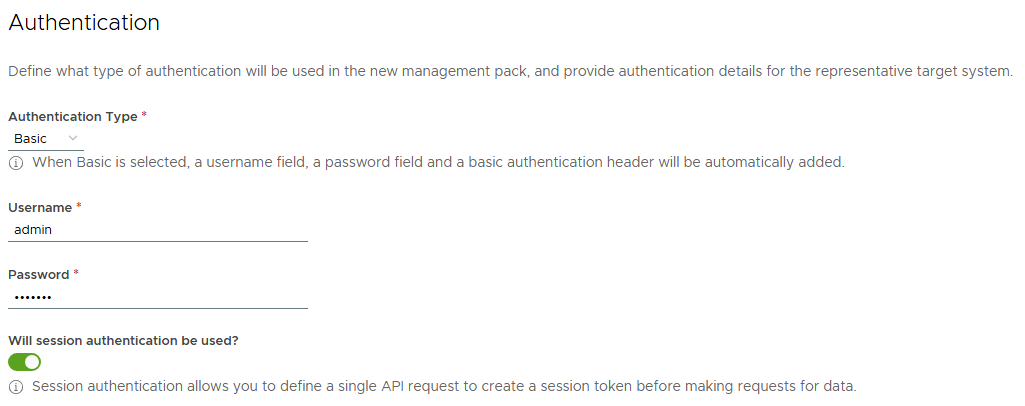
Now on the authentication tab, we’ll be supplying a username & password to create a session token which is used to authenticate. This is where we start to require the API Documentation. Here’s the Authentication Section.

Back in the MP Builder, we’ll add our phpIPAM admin username/password and enable the session authentication switch. This setting will depend on the API you are monitoring so you’ll need to refer to the specific documentation.
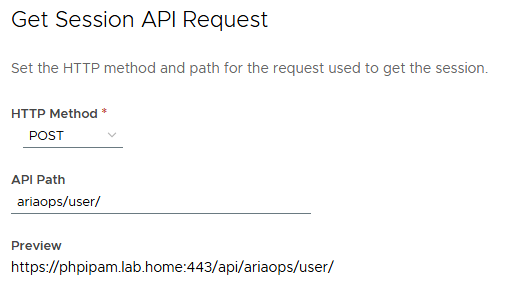
We configure the API path below – ariaops is the name configured in the phpIPAM application and /user we obtained from the documentation. All of the urls will contain “ariaops” in the path.
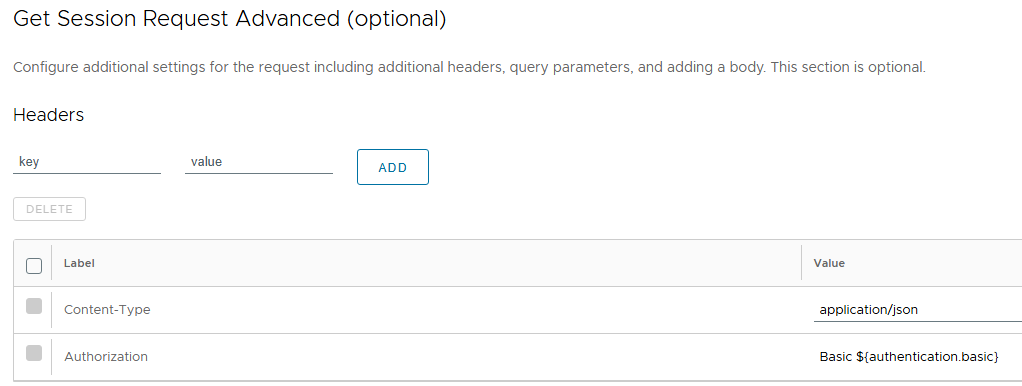
Nothing is needed on the Advanced page, but if your API endpoint requires additional headers in the HTTP request, we can add them here. phpIPAM just requires the content type, and the authorization.
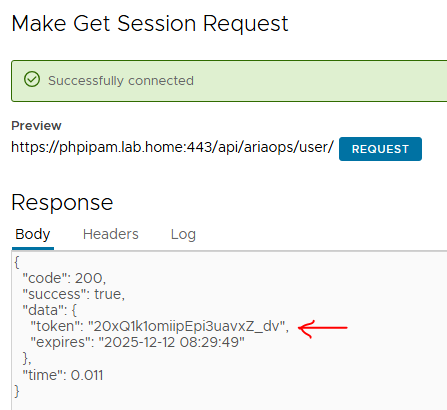
We can now do a test login – this should return a token which will be used in subsequent requests. And it’s worked!
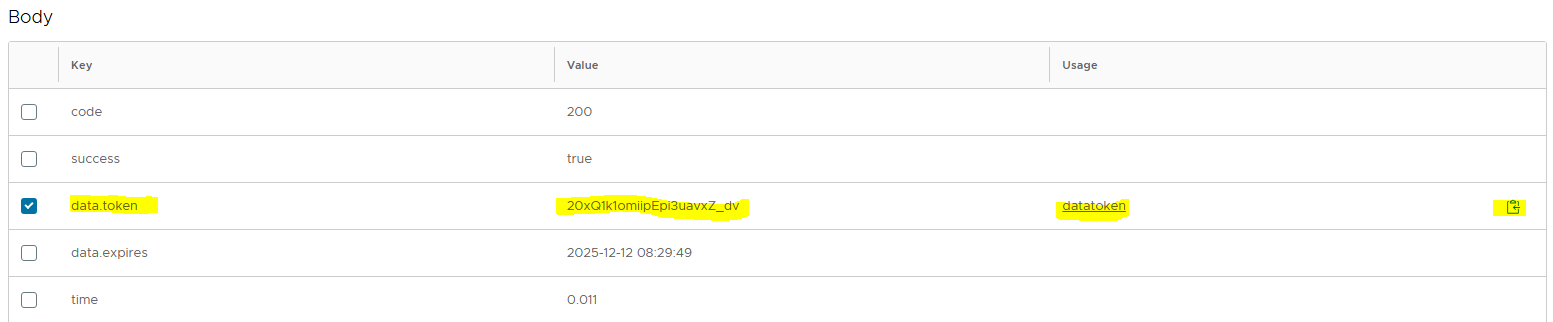
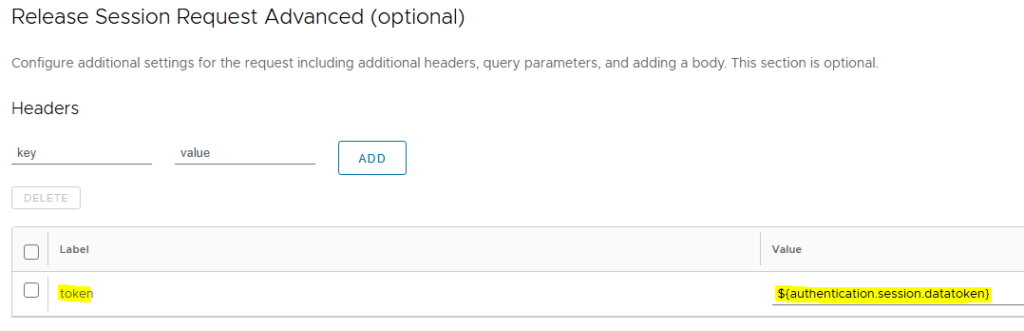
Now we need to configure so that returned token is added to the HTTP request header on subsequent requests. The token has been extracted as a field – we’ll click on the “copy to clipboard” icon to get the variable name which is ${authentication.session.datatoken} in this example.
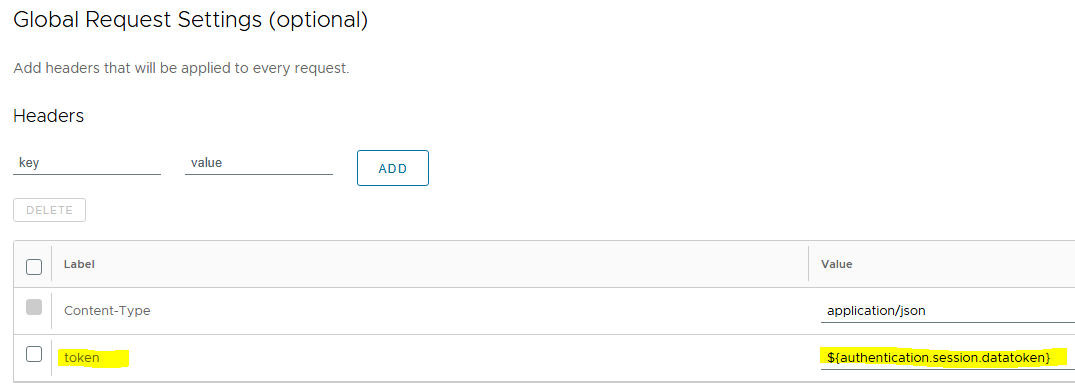
As per the API documentation, we need to include this in the subsequent request headers using either “token” or “phpipam-token”. We then paste the variable name from the previous step into the “Value” field.
Now we need to configure the logout/session termination. Again, as per the API documentation we’ll submit a DELETE /user HTTP request:
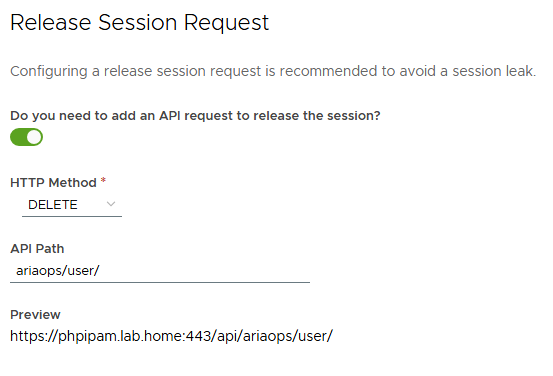
And again, we’ll put the token in the header:
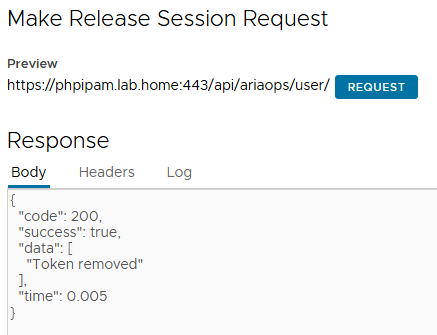
Then we’ll test the release.. Looks good!
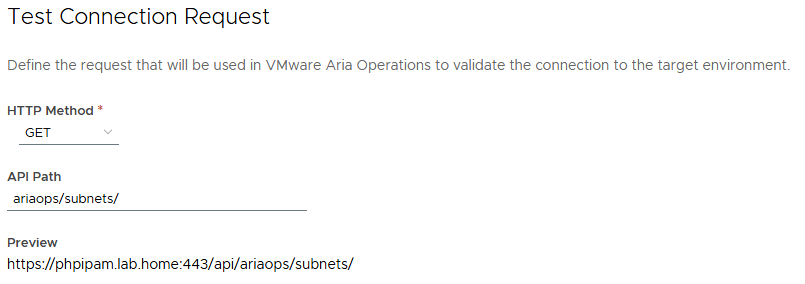
Now we can run a test of the Login -> API Call -> Logout flow by hitting another API endpoint. I’ll attempt to pull a list of the Subnets configured in phpIPAM – if successful then our Auth config is complete.
Click through the advanced page, then click “Request”
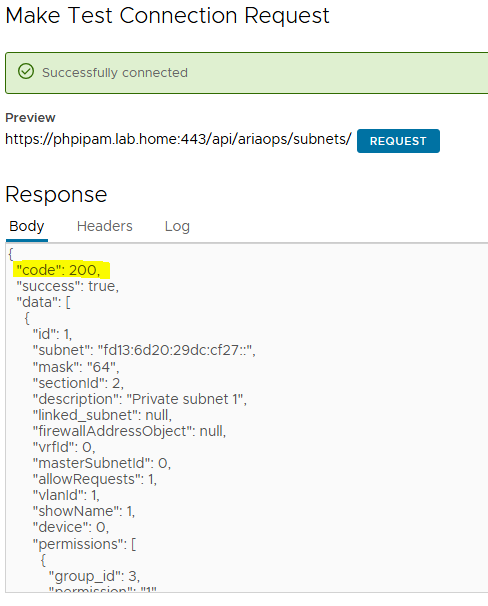
We’ve got a HTTP 200 code, which means successful and we can see a list of the subnet definitions in the JSON response. So that’s a success!
Now we have the authentication part sorted out, in Part 2 we’ll start looking at the data we can pull out of phpIPAM and bring into Aria Operations.