Advanced Holodeck 9 – Custom ESX Images
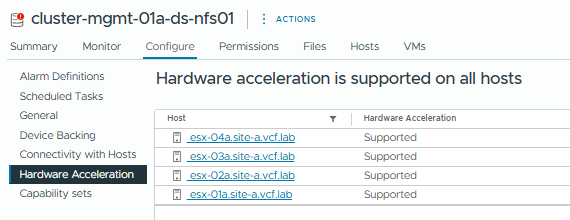
Most of the Holodeck environments I deploy are on NFS primary storage. The Synology device I have requires an additional ESX driver to enable the hardware acceleration features when using NFS.
To streamline the deployment I’ve created a custom ESX image with the driver baked-in so I don’t have to roll it out after a deployment.
Overview:
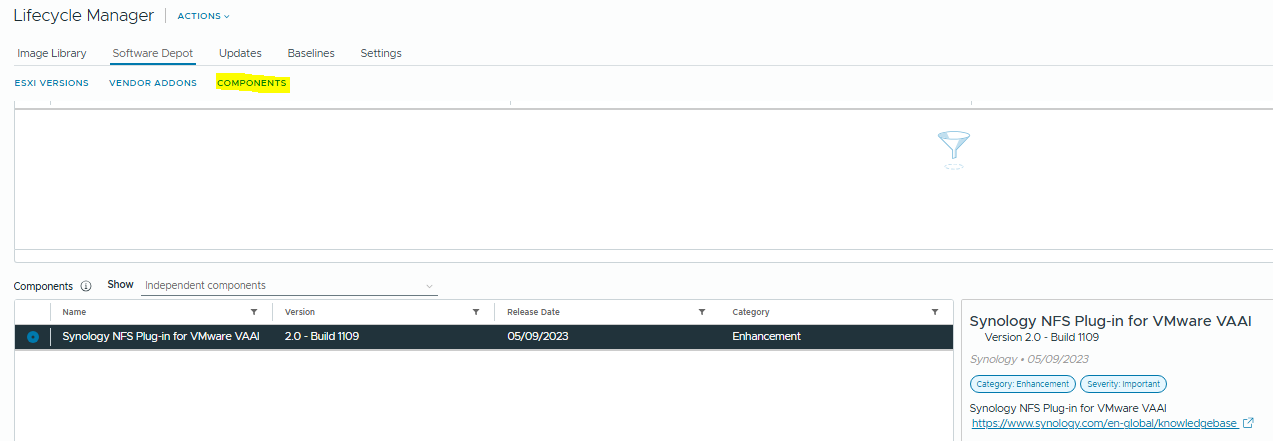
Upload the Synology VIB to the lifecycle manager
Create a Custom ESX Image and Export the ISO
Upload the image to the HoloRouter
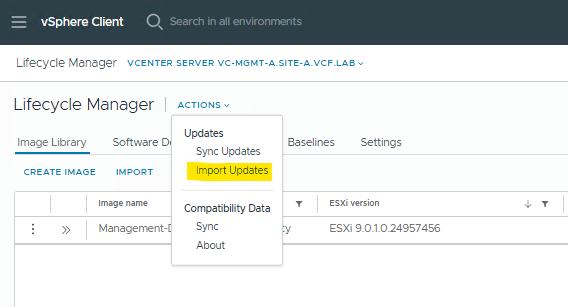
Step 1: Log into vCenter, browser to Lifecycle Manager and we’ll upload the Synology VIB
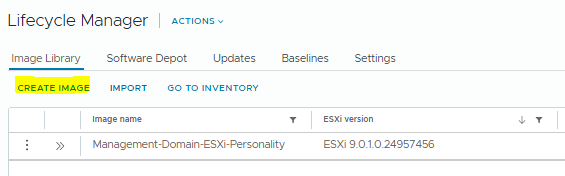
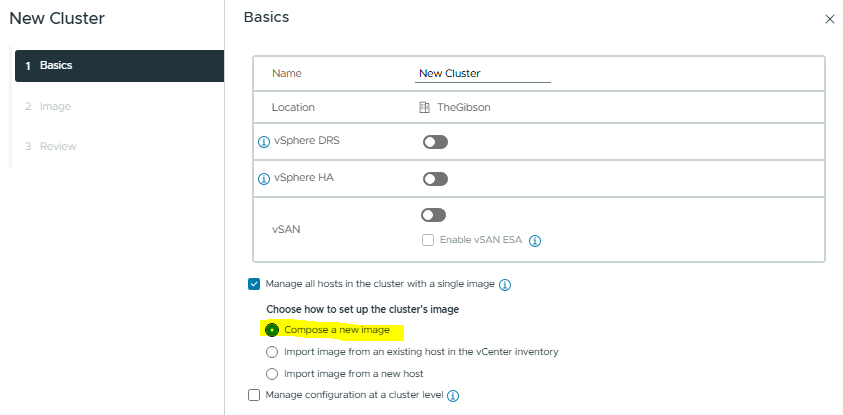
Now we can create the Image.
Browse to Image Library and click “Create Image”
(If you are using vSphere 8, you’ll need to create a dummy cluster in the inventory view).
vSphere/VCF 9:
vSphere 8:
Give the image a name, select the ESX build that matches the VCF BOM you’ll be deploying, and click “Add Components”
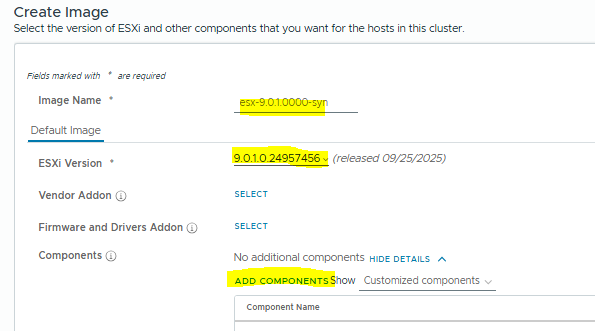

Select the Synology Component and click “Select” then “Save”.
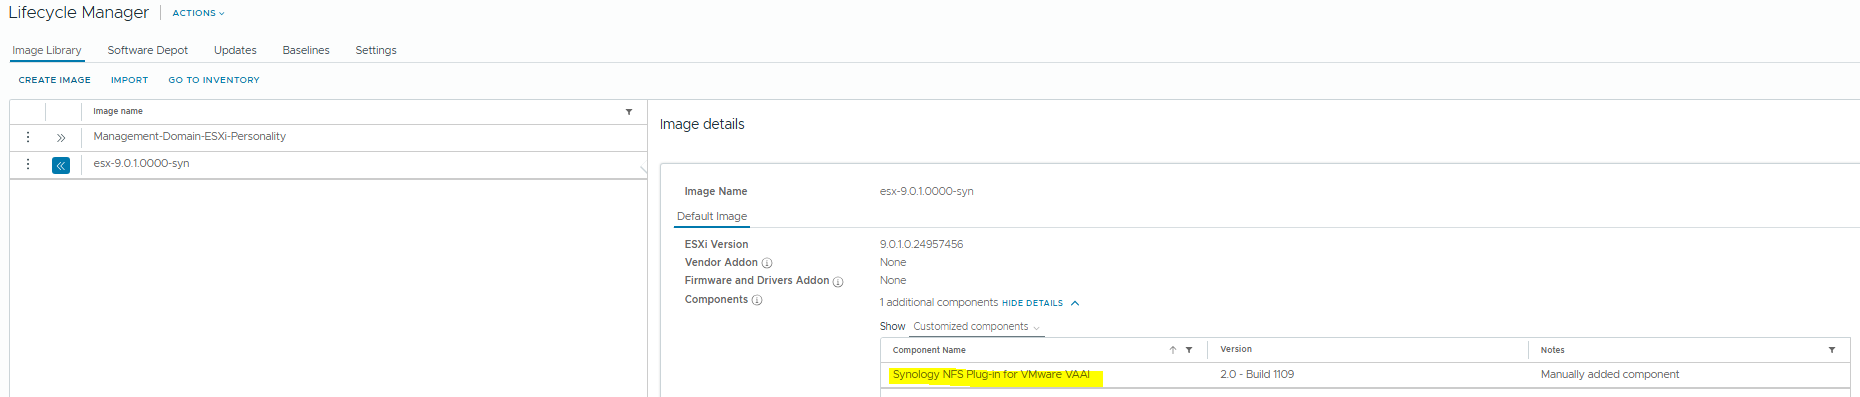
We can now see the image with the Synology Components added:
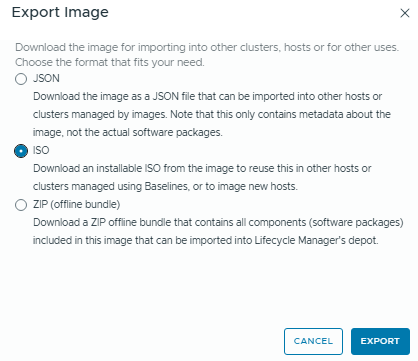
Click the dots next to the image and select “Export”, and select “ISO”
Now rename the image to match the OEM filename – in this instance I’m deploying Holodeck 9.0.1 so the image name will be “VMware-VMvisor-Installer-9.0.1.0.24957456.x86_64.iso“
Now upload the image to the HoloRouter with SCP, into the folder /holodeck-runtime/bin/9.0.1.0
And we’re done. Next time you deploy your Holo 9.0.1 environment, it’ll use the ESX image that has the Synology plugin pre-installed.