VCF Security Services Platform (SSP) / vDefend Advanced Threat Protection – Part 2 (Configuration)
Welcome back. In the first part we covered the SSP Deployment. We’ll cover the config and feature activation in this part.
Once the deploy is successful, we can log directly into the SSP management – this was configured as ssp.site-a.vcf.lab
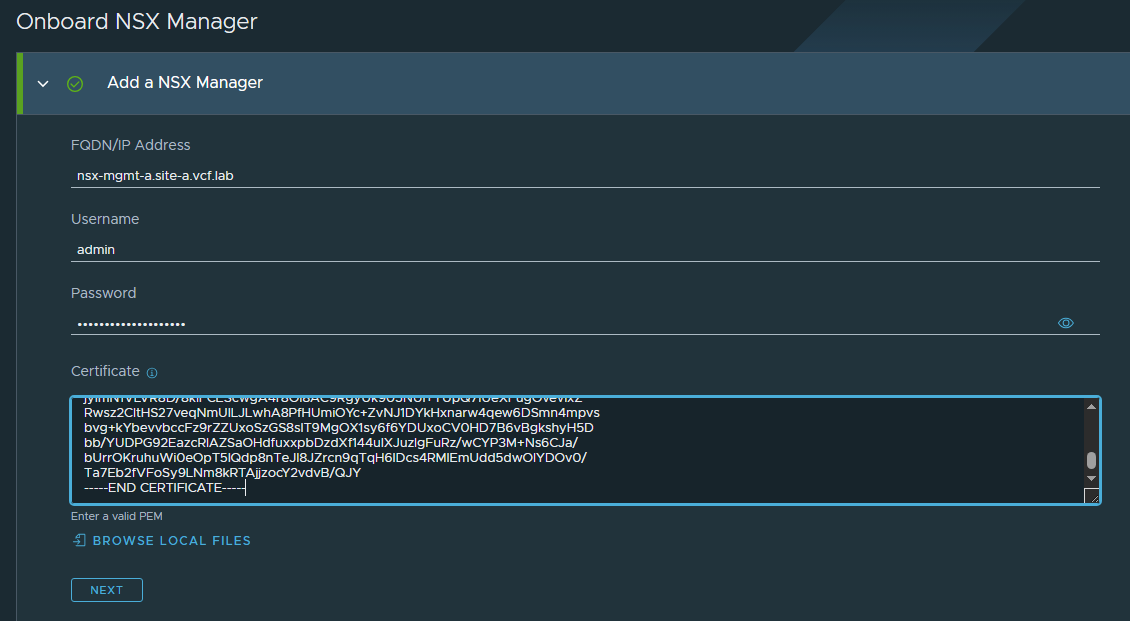
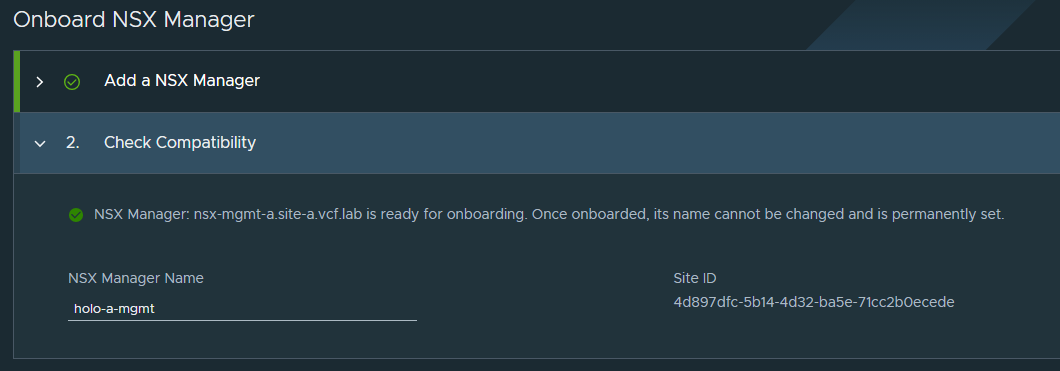
We will be immediately prompted to onboard an NSX Manager. This demo will be for MGMT domain only, but the SSP platform can be shared between multiple WLD domains, if they are running a shared NSX Instance. Otherwise it’s a 1-1 mapping for NSX Manager -> SSP Platform.
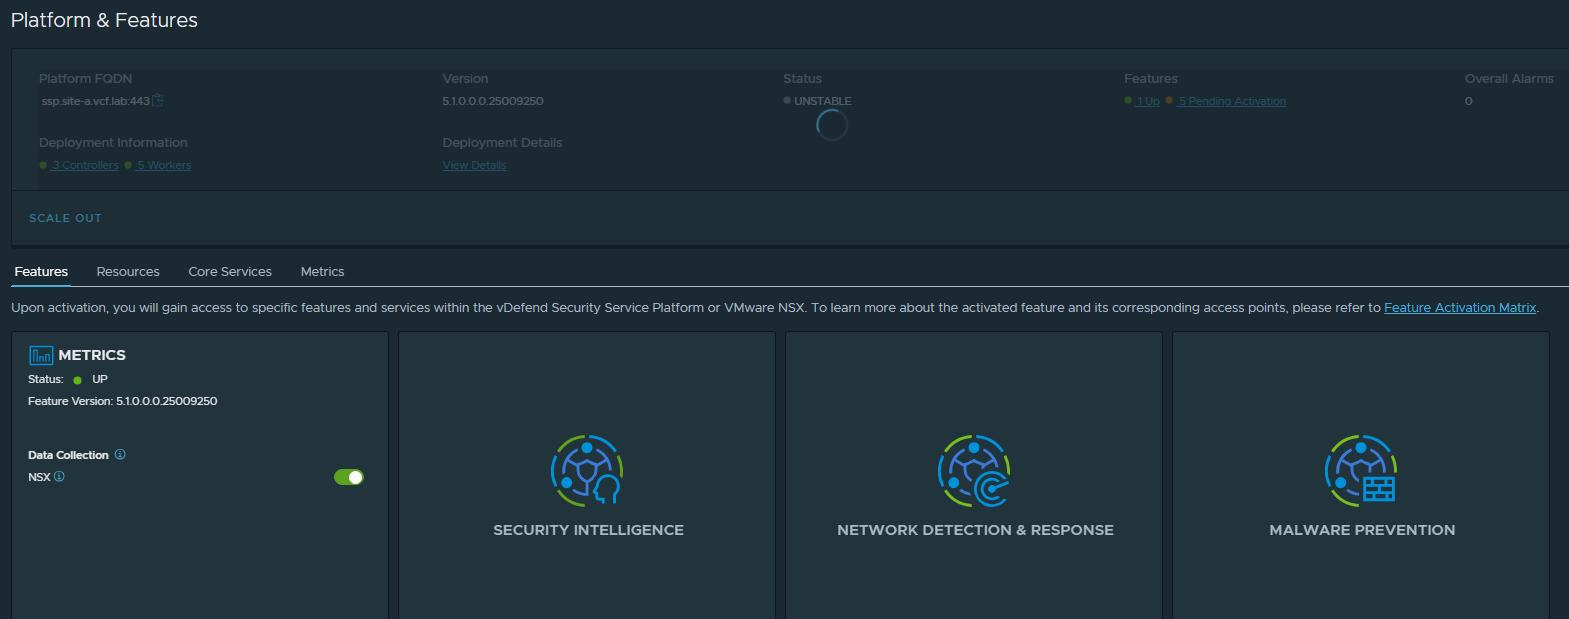
Once the NSX Manager is onboarded, we’ll get the landing screen.

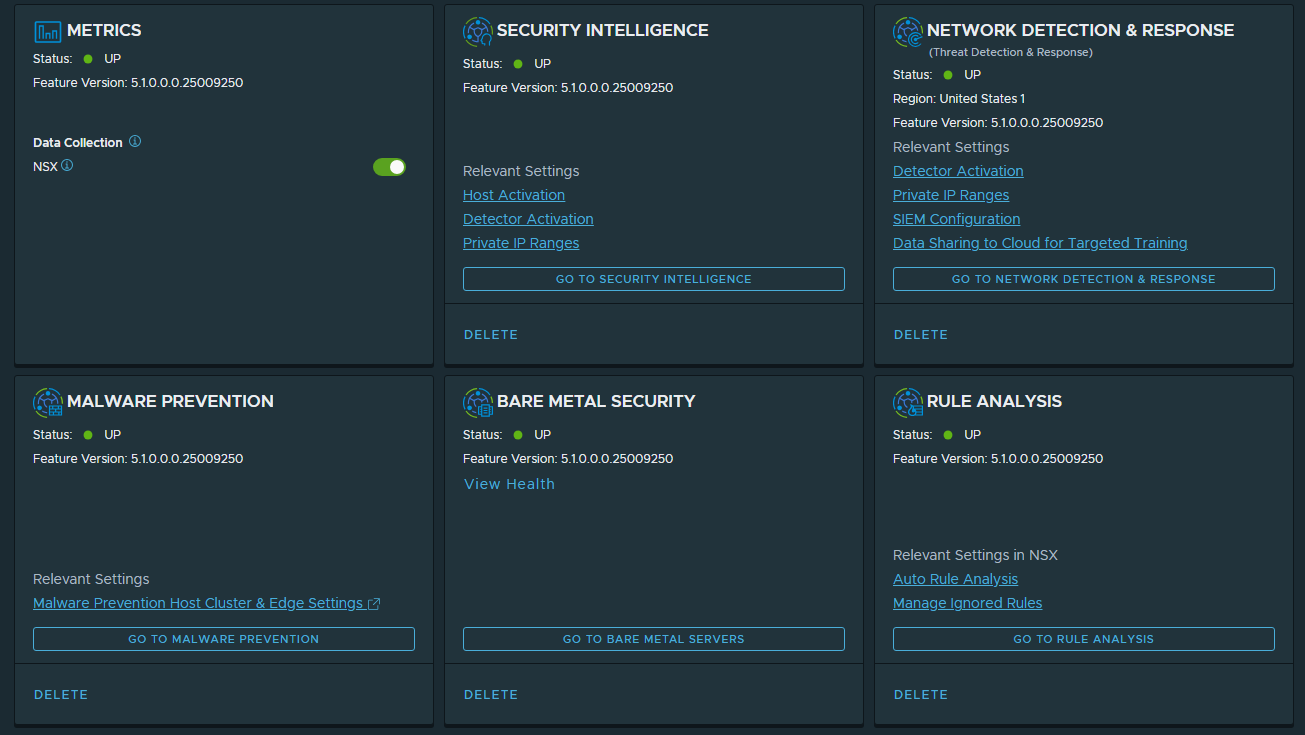
Now we can see that it’s not doing anything, because there’s no features activated.
Browse to System / Platform & Features
Now we can hover over the different features, and click “Activate” to enable the different add ons.
Note: You can only enable the features you are licensed for – your account team should be able to help here.
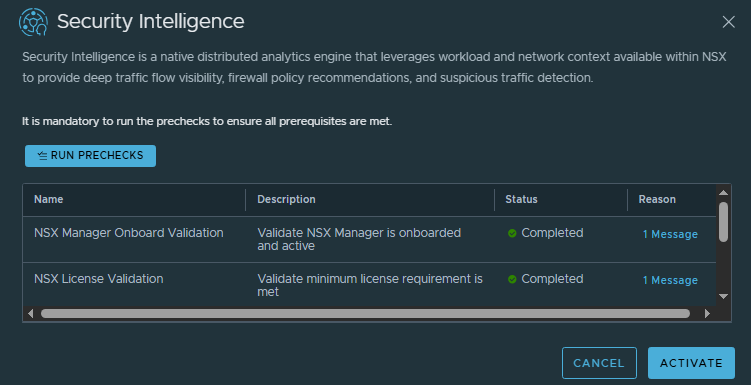
The SSP will check compliance against the licenses you have installed in NSX.
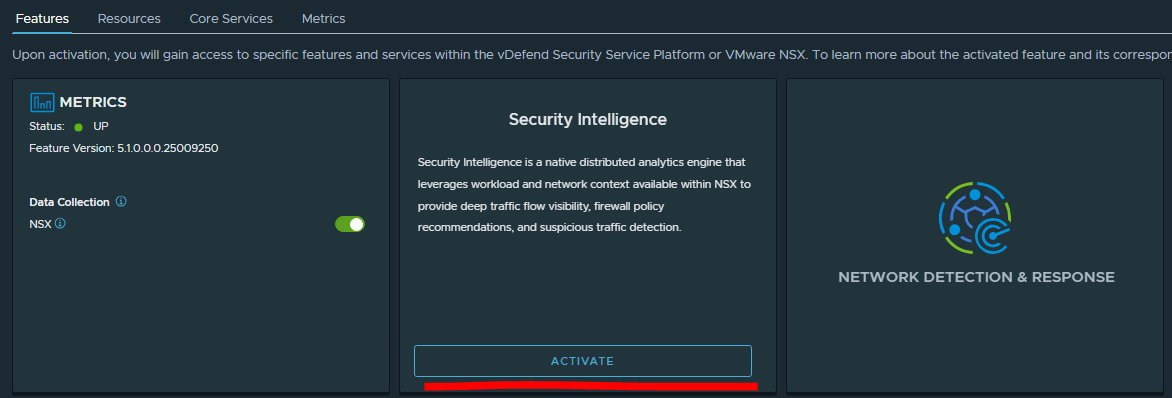
Run the pre-checks, and if all is green then we can activate the service. This will deploy all the required pods/config to the SSP k8s cluster to enable that feature set.
I’ll enable these one-by-one until we have all features enabled.
This is it for part 2, we’ve onboarded the NSX Manager and enabled the services. In Part 3 we’ll continue on with the VMware Validated Solution (VVS) for Lateral Security and enable the firewall rules for the management components.