VCF 9 – Enable and Configure SSO Part 2 (vCenter / NSX)
In Part 1, I showed how to connect the Identity Broker to your Active Directory. In Part 2 we’ll be configuring the role mappings in vCenter and NSX.
First, we need to link the products to the SSO Provider.

Click “Edit” and we can select the NSX Manager and vCenters to enable.
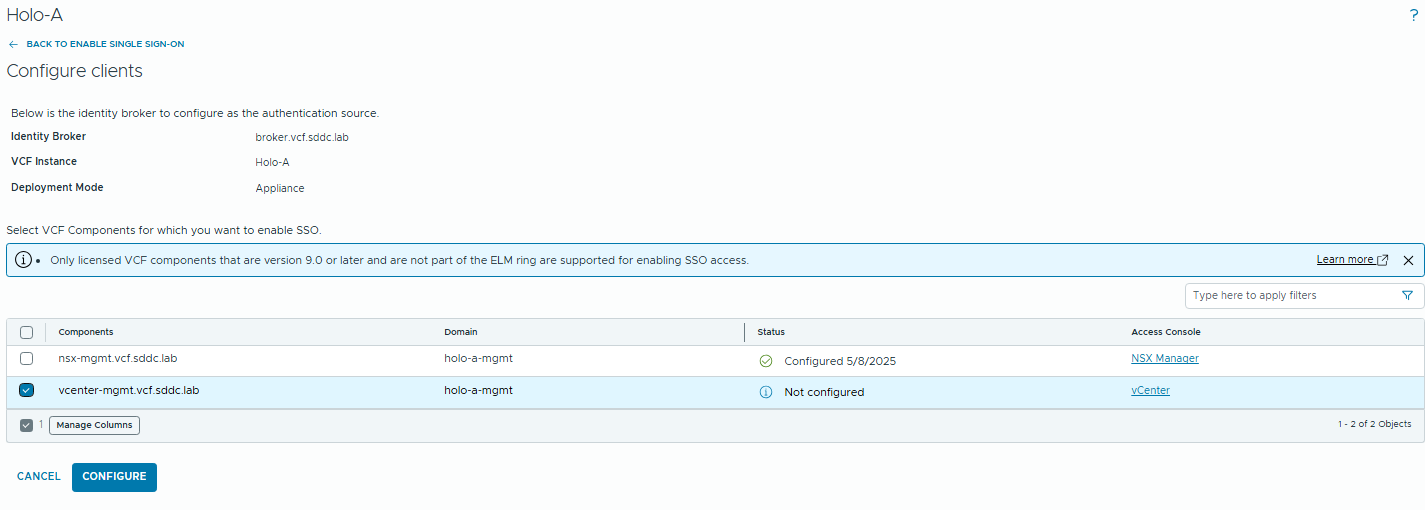
Note the warning at the top regarding ELM. Enhanced Linked Mode is going away in VCF 9, and there will be a procedure to unlink your vCenters for Brownfield environments.
When you click configure you’ll get a warning.
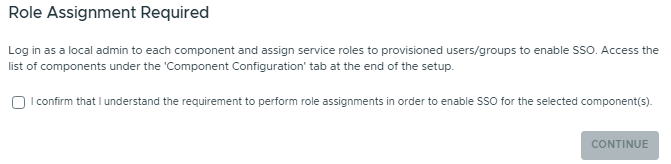
Select the checkbox and click “Continue”
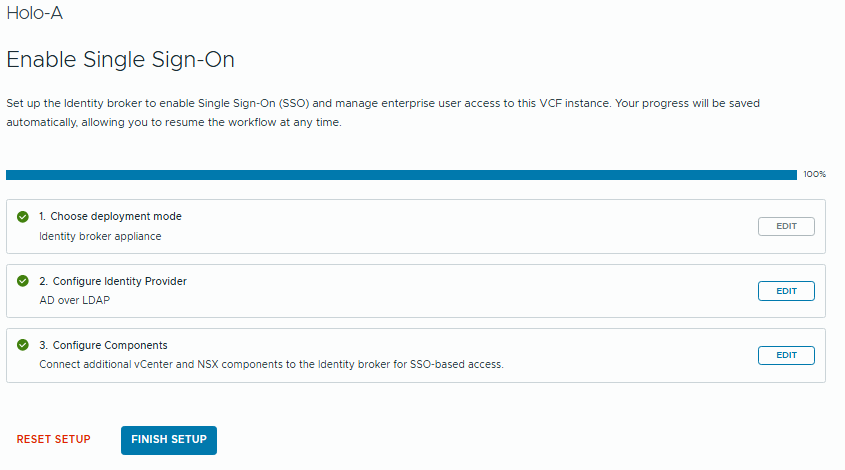
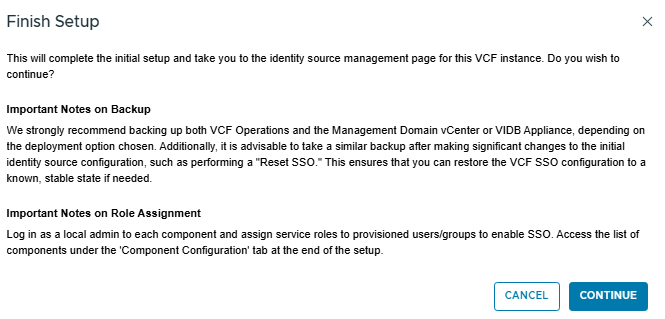
Now we can finish the setup.
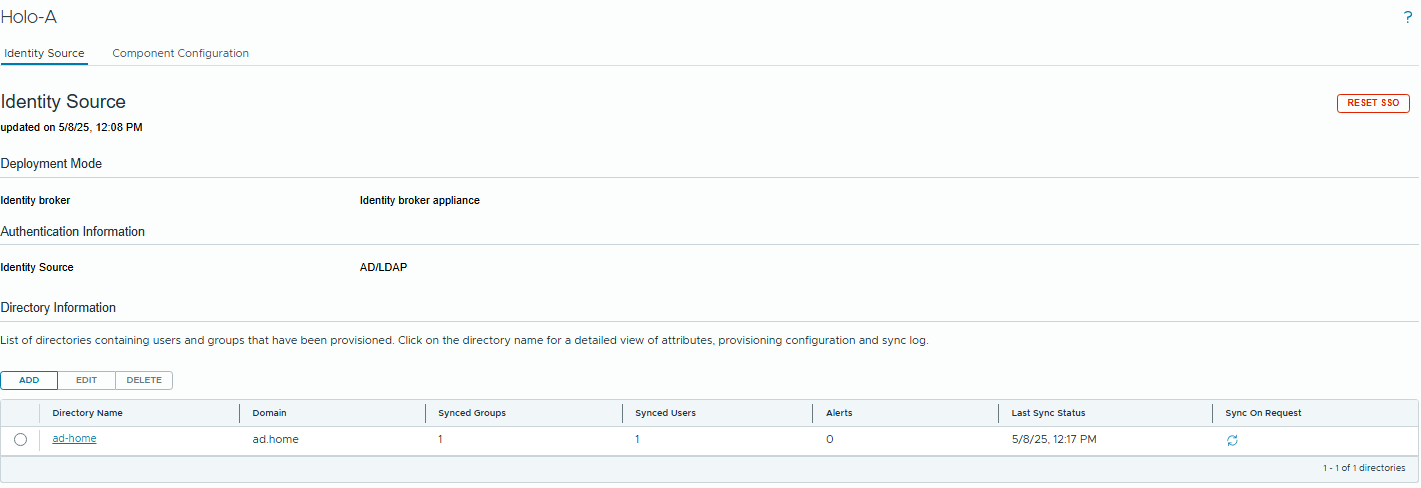
Now we can see the configured directory, and synced groups.
Now we configure the products.
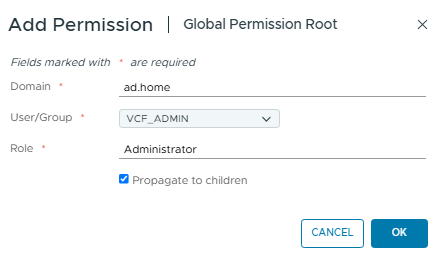
Log into the vCenter as the local administrator (administrator@vsphere.local). Then browse to Administration/Global Permissions and click “Add”
We’ll assign administrator privileges to the AD Group VCF_ADMIN.

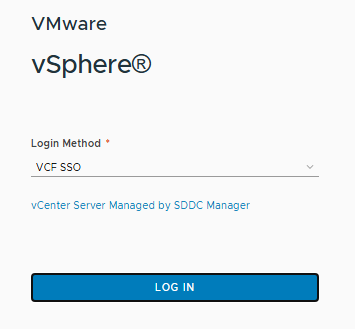
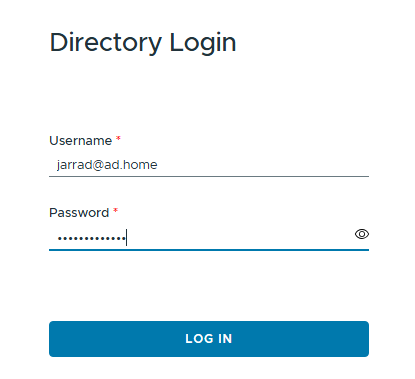
Now we can sign out of the vCenter and login with the AD Credentials. On the login page we now see VCF SSO. Click “Log In” and use your credentials.
Now we can configure NSX – Log into your NSX Manager as the local admin user, browse to System / User Management.
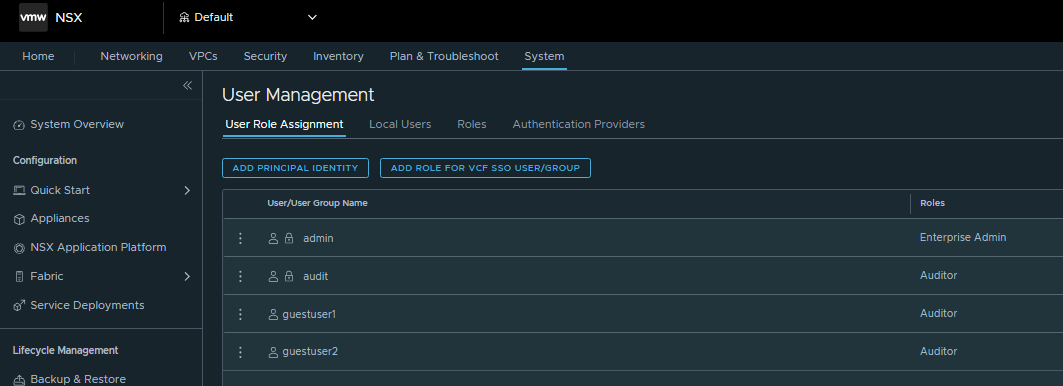
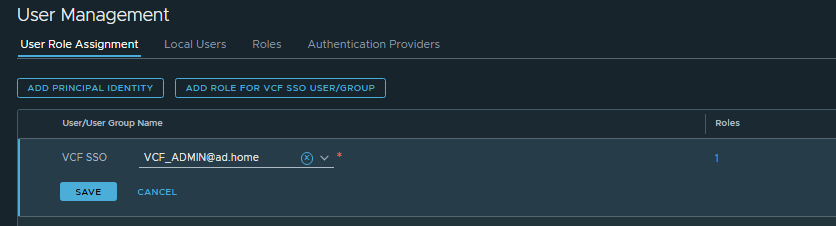
Click on “Add Role for VCF SSO User/Group”. Search for your group name, assign a role and click “Save”
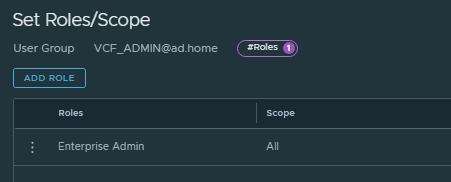
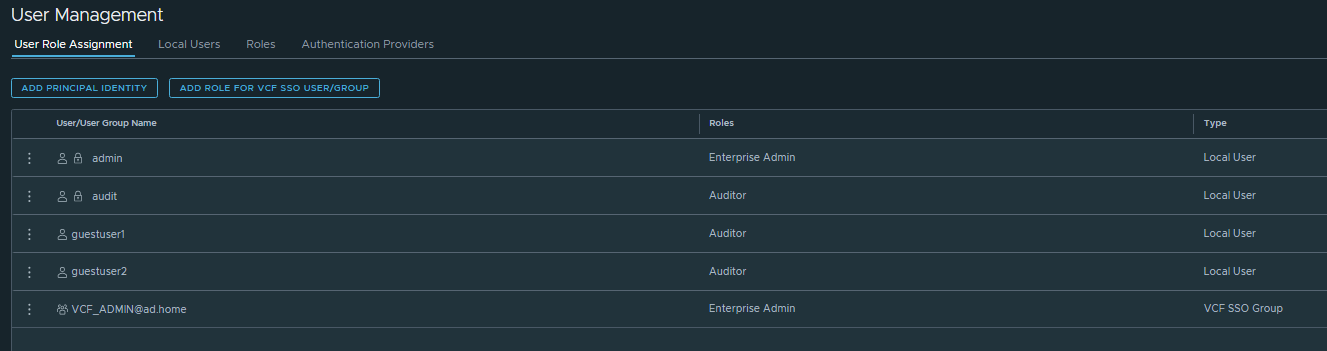
Now we can see the role listed.
Log out of the NSX Manager and log in via “VCF SSO” on the login page.

And that’s it! In a corporate/enterprise environment you’ll likely be wanting to configure various roles for Level 1/2/3 support, Service Accounts etc. but you can just repeat the role mapping steps to achieve this.
In Part 3 I’ll be covering the connection of VCF Operations and VCF Logs to the SSO Broker.